FAQ-Wireless Security Camera Kit
One or two cameras disconnected / connect failed?
How can l troubleshoot camera issues: IPC disconnected / Connect failed?
A: 1. Check to see if the power adapter is working by testing with power adapter of a good camera.
2. Move the camera close to NVR box to check whether videos show in monitor or not. If yes, the camera power adapter may be defective.
3. lf there is no video, cover the camera photocell with your finger as shown in the figure below. If the IR-CUT light turns red in the darkness, the camera is working but still not show image.

Please delete the cameras which Connect failed on Camera setup, press camera reset button about 10s, click ![]() , Continue, wait for a new camera IP address show up, then still click continue to exit and install camera outside.
, Continue, wait for a new camera IP address show up, then still click continue to exit and install camera outside.


If it does not turn red, this indicates that the camera has experienced a malfunction. In this case, please contact us for after sale service.
How to do if forget NVR password?
How to do if forget the system password?
A: 1. Press the reset button for 3 seconds, NVR will reboot and clear the password, Network and other settings)

2.After reboot NVR, The system will restore the factory settings. You need to select the language, connect WiFi, reset the password and setup a new password, but you don't need to reconnect the camera.

How to add a new camera to your NVR?
How to add a new camera to your NVR?
Video Instruction: https://youtu.be/EWz0ZaCAN_E
A: Pease refer below steps to connect camera with NVR.
1. Connect camera with power adapter, and put it close to NVR,
2. Make camera antenna and the NVR wifi antenna are parallel,
3. Right click the mouse, select camera, click add icon, continue,
4. Press the reset button for 10s, then move the hand away
5. New camera ip address 172.20.14.** show up, click continue to complete connection.

Connected the system with monitor, why nothing is showing here?
Connected the system with monitor, why nothing is showing here?
A: Default output resolution of the NVR is 1080P, which may not be compatible with some monitor screens. There are a few options you can try to fix it:
1. Press the left side of the mouse about 30s, don’t remove your finger from the mouse, and wait the system reboot, it will change to the
minimum resolution.
2. Try another monitor with hdmi cable until getting video on the monitor screen. Don't forget to change the input to hdmi on a tv.
3. When you see the video on another monitor, right click the mouse→
system setup→ general setup, adjust the display resolution to 1440x900, click save changes. Finally. Change to connect system with the first tv monitor, check if you can see the video once connected.

How to install the hard drive?
How to install the hard drive?
A: The camera system is compatible with 2.5 inch 1TB hard drive.


HDD not found on NVR?
What should do show HDD not found on NVR?
A: 1. Open the cover behind the NVR, check whether the hard drive is installed, take out the hard drive and reinstall it.
2. Check the power adapter of NVR is 12V2A or 12V1A, it must using the 2A power adapter.
3. Right click your mouse→ system setup→ storage setup, check whether you can see the hard drive info. If so, the hard drive is working.

How to receive notification alarm message on cellphone?
How to receive notification alarm message on cellphone?
A: 1. Right click the mouse→ Camera→ enable Push notification, after set it up, click Copy camera settings to set to all channel.

2. Enable App Alarm on mobile phone
Go to the app→ click ![]() icon→ enable Alarm push.
icon→ enable Alarm push.
Click System authority settings, turn on all permission of the app.


How to do if camera lost signal with NVR?
How to do if camera lost signal with NVR?
A: Please check if the antenna on the camera is loose.
change the wireless channel and region of the camera system, and the antenna of NVR is better to stand up.
change region to FCC, wireless channel change to 1, 6, 11 to check.
change region to T-mode, wireless channel to 3.
change region to EU, wireless channel to 13.
Then reboot the NVR.

If the distance between camera to NVR is over 30FT, you can add a WiFi repeater.
Setup WiFi repeater
1. plug in power adapter, and using network cable connect repeater to NVR.
2. press the reset button on the repeater for 15s.
3. right click your NVR mouse→ Camera→ Add camera→ Manually→ click search.

How to do if NVR offline?
How to do if NVR offline?
A: 1. Please right click your mouse→ system setup→ Account/APP→ check the cloud id is showing online or offline.
2. If offline, go back to main menu→ Network setup→ Connect to router, Check if NVR is successfully connected to WiFi
3. If success, go to connect to router (wire)→ check the network sate is healthy or unreachable,
If showing gateway unreachable, please click DHCP→ select Static, power off the NVR and power on again.

4. When it showing Healthy Network, go to Account/APP interface to check cloud ID is online or offline.
If still offline, please send email us at support@stoxtar.com
Why can't I hear the sound?
Why can't I hear the sound?
A: 1. Please left click your mouse, you will see a small menu, check if you have turn on the sound option.

2. If the audio is already on, but still can not hear sound, please right click your mouse→ system setup→ general setup→ Audio output mode, select
HDMI+Speaker.

How to using PTZ control on NVR?
How to using PTZ control on NVR?
A: 1. Please left click your mouse→ click PTZ icon.

- Click the PTZ steering wheel above to move the camera up, down, left and right.

How to setup Frequently viewed location?
How to setup Frequently viewed location?
A: 1. Left click channel screen, select PTZ icon, adjust the camera lens to a position you want, then click add + to set it as frequently seen location 1. Frequently seen location 1 is home point by default.

2.Click “Goto”, the camera will rotate to the position you set. You can follow the steps to set more frequent view positions.

How to do when the camera can not move?
How to do when the camera can not move?
A: If your camera is optical zoom camera, you can try to setup digital command, and the camera pan tilt will restore the factory settings.
- Please left click your mouse→ PTZ→ shortcut mode→ tap arrow option to delete the existing number, then input 40, set.


2. If your camera is digital zoom camera, please unplug the power adapter, wait for 5-10 minutes.
Plug it again. Try to move the camera again, if still can not move, please contact us.
How to turn off APP advertisement?
How to turn off APP advertisement?
A: Click Me→ Settings→ Launch page ads, disable it, then it will pop a message, click Turn off ads. Then it will be turn off successfully.

How does the wireless security camera work?
Share the cameras with family
In App, click “![]() ” icon to share the device to your family members or friends without letting them know the system admin password.
” icon to share the device to your family members or friends without letting them know the system admin password.
Share Permissions: set the permissions allow others to check.
QR code validity period: QR code valid time
Let people whom you would like to share your cameras download Eseecloud App, register an account and scan shared QR code to view the cameras.


Connect the security system to Network
There are two ways to connect the NVR to Network:
a. Connect to router(wired)
When you connect the NVR to your router via network cable, you can check whether it is successfully connected with on this interface.
DHCP: adaptive local network
IP address: NVR IP address(according to your router change to the same, the first 3 number should be the same, the last one can’t be same, otherwise it will show IPC conflict)
Gateway: use router Gateway
Netmask: 255.255.255.0, no need change
Preferred DNS: suggest use 8.8.8.8
Alterable DNS: suggest use 114.114.114.114
Network status:
Healthy network: network connect successfully
Gateway Unreachable: means NVR IP gateway and IP address not the same as your router, Click DHCP, select static, then find your router correct IP gateway, such as 192.168.1.1, then IP address should be 192.168.1.*** which can’t be the same as your router, change it on NVR.
Request DNS Error: disable DHCP, reboot the NVR and your router.
Network Cable Disconnect: make sure the NVR connect with router by Ethernet cable
Network Busy: disable DHCP, change the preferred DNS to 8.8.8.8, reboot the NVR and your router.
b.Connect to router(wireless)
Except wire connection, you also can connect NVR to your home WiFi wireless. Select you home WiFi and input password, click connect.

How to view security system on MAC and Windows Computer?
1. Make sure the NVR monitor is ONLINE status:
Please right click your NVR mouse, go to System Setup--Network
The Network statue should be Healthy network. If not, please connect the security system to Network
There are two ways to connect the NVR to Network:
a. Connect to router(wired)
When you connect the NVR to your router via network cable, you can check whether it is successfully connected with on this interface.
DHCP: adaptive local network
IP address: NVR IP address(according to your router change to the same, the first 3 number should be the same, the last one can’t be same, otherwise it will show IPC conflict)
Gateway: use router Gateway
Netmask: 255.255.255.0, no need change
Preferred DNS: suggest use 8.8.8.8
Alterable DNS: suggest use 114.114.114.114
Network status:
Healthy network: network connect successfully
Gateway Unreachable: means NVR IP gateway and IP address not the same as your router, Click DHCP, select static, then find your router correct IP gateway, such as 192.168.1.1, then IP address should be 192.168.1.*** which can’t be the same as your router, change it on NVR.
Request DNS Error: disable DHCP, reboot the NVR and your router.
Network Cable Disconnect: make sure the NVR connect with router by Ethernet cable
Network Busy: disable DHCP, change the preferred DNS to 8.8.8.8, reboot the NVR and your router.
b.Connect to router(wireless)
Except wire connection, you also can connect NVR to your home WiFi wireless. Select you home WiFi and input password, click connect.
2. Download ESeeCloud CMS Software
Download the EseeCloud CMS fromSTOXTAR Website:
https://stoxtar.com/pages/download
Install and run it on your computer
Install the software on your PC and run it.
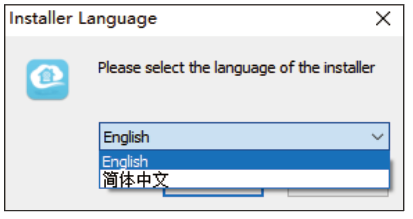
Select English to install the software.
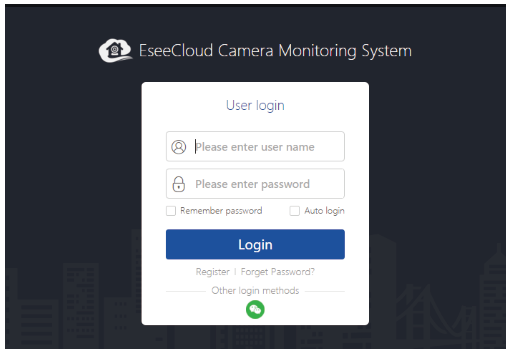
3. Login with phone EseeCloud account(email or phone number and
password).
Mac computer please click switch to cloud login then input phone
EseeCoud account.
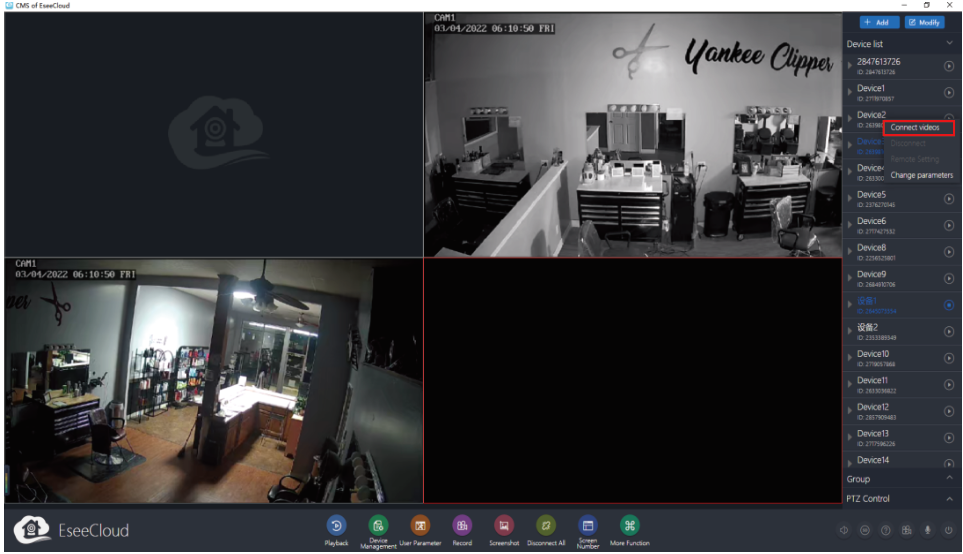
After login, camera system will automatically synchronize on computer.
How to change night modes of security system?
Here is the video instruction: change night modes
How to Zoom in/out videos?
Here is the video instruction for zoom in/out videos: https://youtu.be/aKaysZu4uMQ
How to change channel sequence in the screen?
Here is the video instruction to change channel sequence: https://youtu.be/kbDWVqbQtkA
How to view all cameras in one screen?
Here is the video instruction to split screen: https://youtu.be/9z-KFicsVkk